Map
You can use the map manager to adjust the terrain, elevation, map size and other attributes.
Map Size
You can adjust the map size using the parser.
Only rectangular maps
The game only supports square maps. Changing the size to a rectangle that is not a square will cause the game to crash.
Maximum size is 480
The game does not support maps over the size of 480. Beyond this size the game will crash when you test the scenario.
You can adjust the map size like so:
1 2 3 4 5 6 7 8 9 10 11 12 13 14 15 16 17 18 | |
Terrain
You can also edit terrain tiles.
Terrain Tiles
Each terrain tile has 3 properties. It's elevation, terrain_id and layer.
You can request this information using:
1 2 3 4 | |
You can also edit this information, for example if you want to change tile 20 into water, you can:
1 2 3 4 | |
You can also request readonly properties from a tile, like its index or coordinates.
These cannot be edited.
1 2 3 4 5 | |
Selection
There's multiple ways to get access to the terrain tiles. The first thing you can do is get access to the entire terrain list through:
1 | |
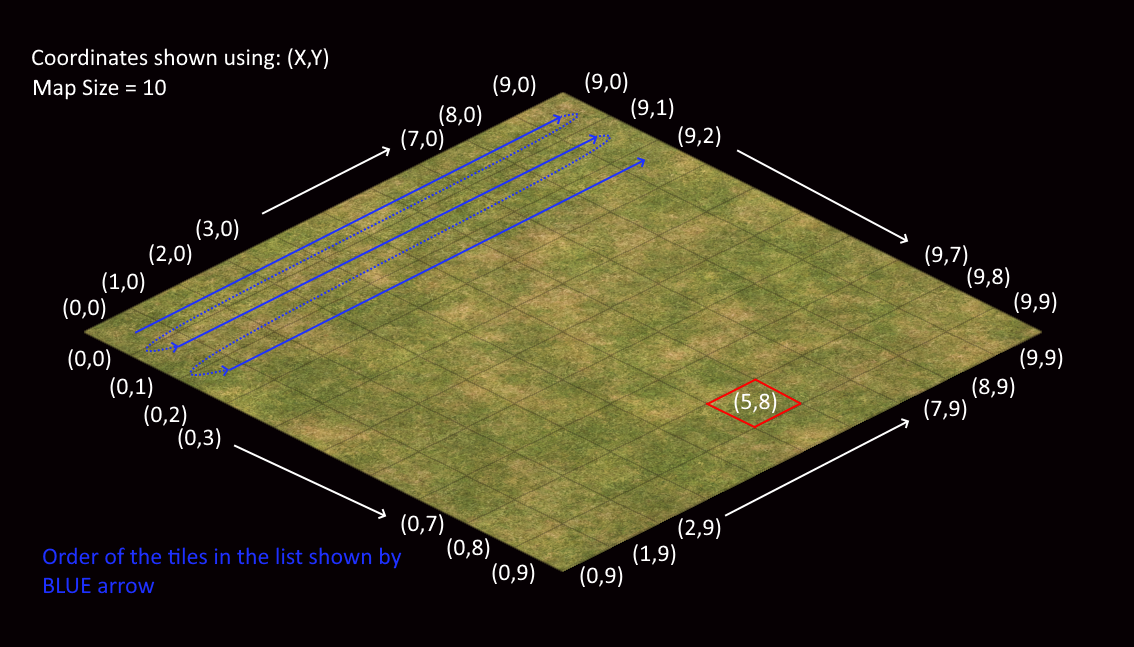
The list is the map stacked in a single list. The first entry in the list is the most West tile in the scenario.
The second entry is the tile to the top right of the last one. The third is on the top right of that one. This continues
until you hit the North East edge. Then it'll continue with the tile to the bottom right of the first tile and the tile
after that is the tile to the top right of it.
Below you can see a visualisation of a 10x10 map. The coords are (X,Y) coordinates and the blue line is the order in
which tiles are saved.

To get a tile based on it's XY coordinate (like (5,8), as highlighted in the above image) you can use:
1 2 | |
You can also get a square of tiles from the map. For this you can use the function get_square_1d() or
get_square_2d(). Both the functions will return the same tiles, but one will result in a list of tiles, the other in a
list of list with tiles.
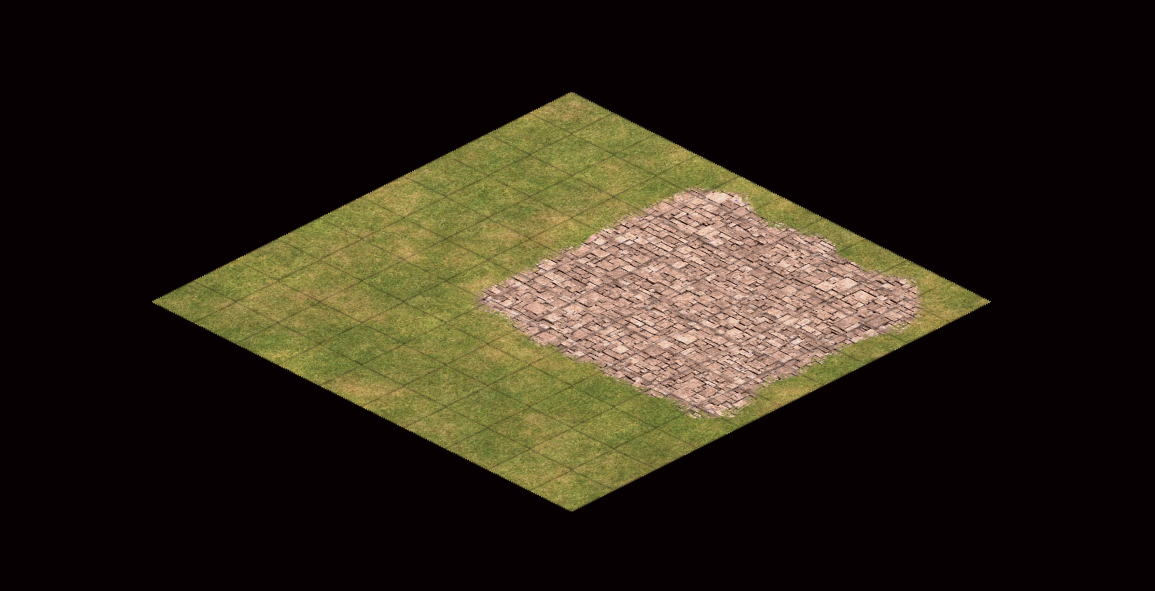
For example, if you want to turn a square of tiles into roads:
1 2 3 4 5 6 7 8 9 10 | |
This will turn the above map into:

Elevation
You can also add hills to the map by using the set_elevation function.
1 2 3 4 5 6 7 | |
Elevation is also zero based
Elevation is zero based, 0 represents what Age2 calls elevation 1, 1 represents elevation 2 etc.
This will create a hill of elevation 3 in the game. The top square of the hill will be 3x3 tiles. Because (3,3) to (5,5) shown in the function above represents the top of the hill. The entire hill, including the slopes, will start on: (1,1) to (7,7).
Don't go too high!
Using the parser you can basically go as high as you want, BUT above ~20 without UHD and ~15 with UHD the camera starts clipping into the hill.